Imagine stepping out of your house and into a tropical paradise, where warm rays of sunshine caress your skin and the sound of crashing waves fills the air. Now, imagine enjoying a refreshing shower in this idyllic setting, with nothing but nature as your backdrop. If this sounds like your ultimate outdoor oasis dream, then it’s time to learn how to install an outdoor shower. Whether you have a sprawling backyard or a cozy balcony, this step-by-step guide will help you bring the luxury of an outdoor shower right to your doorstep.
What is An Outdoor Shower?
Outdoor showers are a great way to get a quick and refreshing fall outside. They’re perfect for those hot summer days, or if you just want to take a break from the house and enjoy some fresh air. Outdoor falls come in all different shapes and sizes, so there’s sure to be one that fits your needs. Some even have built-in benches, so you can relax while you take your fall.
Why Should You Install One?
There are a few reasons why you may want to install an outdoor fall. Perhaps you’re tired of using the fall facilities at your apartment complex, or you want to take a bath outdoors in the middle of summer. Outdoor falls also come in handy if you live in an area with a lot of rainfall. By installing one, you can avoid getting your feet and clothes wet while walking outside to take a fall.
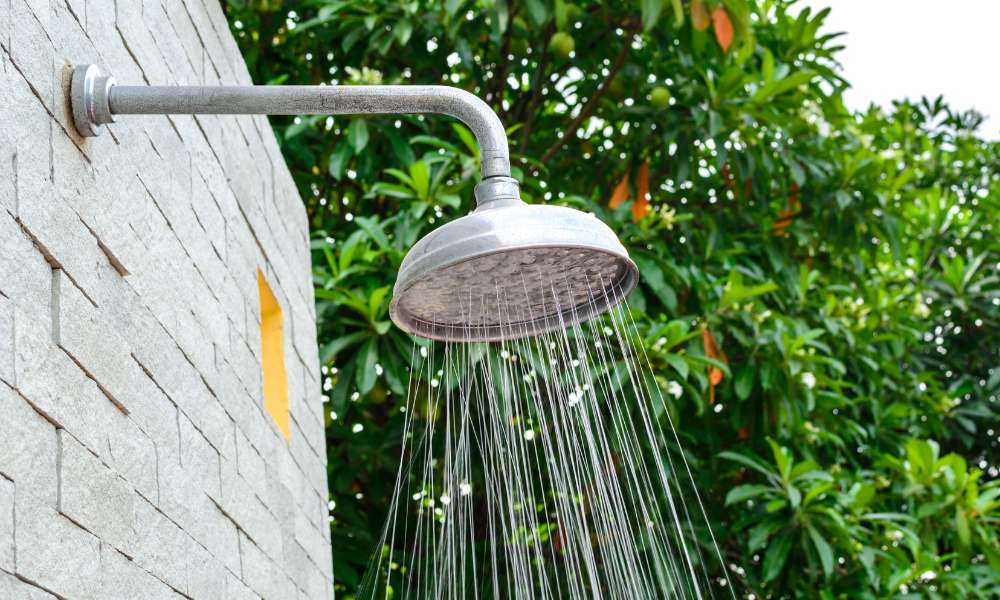
What You’ll Need To Build Your Own Outdoor Shower?
If you’re looking to get your outdoor shower up and running, there are a few things you’ll need. First, you’ll need a sturdy platform or base. This can be anything from a large rock to an old patio chair. You’ll also need some supplies for the fall itself, including pipe fittings, water hoses, and a rain barrel or cistern to hold water. Once you have all of your supplies, it’s time to get started!
Preparing The Ground:
Digging
Digging is an important step in gardening. It helps to prepare the ground for planting, and it also improves drainage. In addition, digging can remove existing plant roots, which can help to improve soil fertility.
Leveling
Leveling is a process that helps prepare the ground for planting or other landscaping activities. It involves removing surface litter, rocks, and other obstacles so that plants or other objects can be placed in better positions. Leveling also makes it easier to work on the soil and improves drainage.
Filling
Filling. Preparation of the ground is essential to obtaining a successful crop. Proper preparation can make all the difference in the growth and yield of your plants. There are many different ways to prepare the soil, but one of the most common and effective is tilling. Tilling loosens up unwanted debris and rocks from the soil, which allows for better drainage and aeration. This process also breaks up compacted soil, making it easier for plant roots to penetrate and absorb nutrients.
Installing The Structure:
Racking And Framing
Racking and framing are common installation processes for new homes. The structure provides the necessary support for the walls, roof, and floors. It also allows you to move items in and out of the home easily. Installing the racking and framing is an important step in preparing for your home’s move-in date.
Plumbing And Wiring
When you are ready to begin your plumbing and wiring project, there are a few things that you will need to do. First, you will need to install the structure. This can be done in a number of ways, depending on the layout of your home. Second, you will need to connect the plumbing and wiring. This can be done using traditional methods or modern technologies. Finally, you will need to test the system and make sure that it is working correctly.
The Installation Process For An Outdoor shower Is Basically The Same As Installing A Bathroom Shower
Outdoor showers come in all shapes and sizes, but the installation process is basically the same. You’ll need to decide where you want your fall to go and then consult a contractor or home improvement expert to get an estimate for the installation.
Once the cost of the installation has been determined, you’ll need to gather all of the necessary materials. This includes construction adhesive, fiberglass mesh, copper pipe, fittings, and valves. You’ll also need a sprinkler system and hose connected to it in case of a leak.
The installation process typically lasts two days with three hours of work each day. Make sure to wear sturdy shoes and gloves during the installation so that you don’t damage your property or injure yourself.
After Installation, Take Care To Keep Your Outdoor Shower Clean And Free From Debris.
After installing your outdoor fall, take care to keep it clean and free of debris. Here are a few tips:
-Remove soiled water and debris immediately after use.
-Clean the fall area with a hose or garden sprayer before each use.
-Avoid using harsh chemicals or abrasives on the surface of the glass.
-Replace the fall head every 3 to 6 months if it begins to leak or corrode.
Conclusion
In conclusion, if you’re looking for an outdoor shower that is both functional and stylish, consider installing one yourself. There are a number of available options, and with the right tools and instructions, installation is easy.