
Embarking on a home improvement project can be both exciting and rewarding, especially when it involves personalizing your kitchen. Learning how to install kitchen cabinet door handles not only enhances the aesthetic appeal of your space but also boosts functionality and overall value. This guide will detail the essential steps and considerations for attaching these fixtures effectively, ensuring that your cabinets look seamless and professional. Whether you’re renovating your entire kitchen or simply looking to refresh its appearance, mastering the installation of kitchen cabinet door handles is a valuable skill that can make a significant impact on your home’s interior design. This process is straightforward, cost-effective, and a practical way to infuse a touch of your personal style into the kitchen.
What Tools Will I Need To Install Kitchen Cabinet Door Handles?
To install kitchen cabinet door handles, you will need a few basic tools to make the process easier and more efficient. The essential tools include a drill with the appropriate drill bit size for your handles, a screwdriver, a tape measure, and a pencil for marking the placement of the handles on the cabinets. Additionally, having a level tool can help ensure that the handles are installed straight and evenly across all cabinets.
How Do I Determine The Correct Placement For The Cabinet Door Handles?
There is no one-size-fits-all answer when it comes to handling placement as it can vary depending on personal preference and the specific layout of your kitchen. It may be helpful to experiment with different placements before making a final decision to ensure that you are satisfied with both the functionality and appearance of your cabinet door handles.
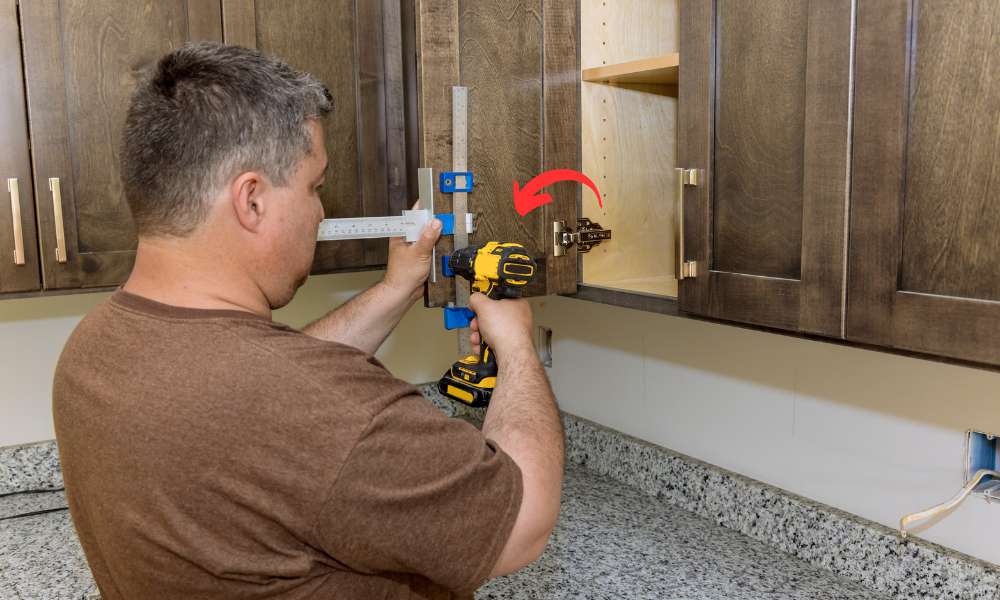
Marking Drill Points
Finding the right cabinet manufacturer can be challenging, but by focusing on how they handle marking drill points, you can determine their commitment to quality and craftsmanship. Take the time to research different manufacturers and ask specific questions about their process for ensuring accuracy in drilling and assembly. By selecting a manufacturer that values precision in every aspect of their work, you can trust that your cabinets will be expertly crafted with attention to detail from start to finish.
Drill Pilot Holes
Drilling pilot holes can save you time and frustration in the long run. While it may seem like an extra step, it can actually make the installation process smoother and more efficient by making it easier to drive the screws into place without any issues. So next time you’re installing new kitchen cabinet door handles, don’t skip this important step – take the time to drill pilot holes and see how much of a difference it can make in achieving a professional-looking finish.
Attach Cabinet Handles
After drilling the pilot holes, you are ready to attach the kitchen cabinet door handles. Start by aligning the handle with the pilot holes. Then, insert the screws through the back of the door or drawer front, threading them into the handle. Use a screwdriver to tighten the screws until the handle feels secure but be careful not to overtighten, as this could damage the wood or the threads of the screws. If your handles come with different screw lengths, ensure you’re using the correct size for the thickness of your doors or drawers.
Materials
1. Cabinet Door Handles
Choosing the right cabinet door handles is the first crucial step. Handles come in various styles, sizes, and finishes, from sleek stainless steel to classic bronze or modern matte black. Consider the overall design theme of your kitchen when selecting handles. It’s important that the handles not only match the aesthetic but also fit comfortably in your hand, making opening and closing cabinets easy and efficient.
2. Screws
The screws that attach the handles to the cabinet doors are vital. Typically, the screws required will come with the handles, ensuring they are of the correct length and thread for the handles you have chosen. If not, you will need to purchase screws separately. The length of the screws depends on the thickness of your cabinet doors, so measure carefully before buying. Using screws that are too long can damage the interior of the cabinet, while too short screws may not hold the handle securely.
3. Drill Bits
Drill bits are used to create pilot holes for the screws that will hold your handles in place. It’s important to choose a drill bit that is slightly smaller than the diameter of your screws to ensure a tight fit. For most cabinet hardware installations, a standard high-speed steel (HSS) drill bit is sufficient. If you are drilling through particularly hard materials, such as certain metals or hardwoods, consider using a cobalt drill bit for better performance.
Double-Check Alignment
With the handles attached, it’s important to double-check their alignment. Misaligned handles can detract from the look of your kitchen and make usage awkward. Look at the handles from various angles and distances to ensure they are straight and aligned symmetrically with one another. If any handles are off, loosen the screws slightly, adjust the handle position, and then retighten the screws. Taking the time to make these minor adjustments will result in a more professional finish.
Remove Protective Covering
Some may find it helpful to use a small utility knife or scissors to carefully cut along the edges of the handle for a more precise removal. This technique can help maintain the overall appearance of the handle while ensuring that all protective covering is properly removed. Remember that patience is key when removing protective coverings from delicate surfaces like kitchen cabinet door handles, and taking your time will ultimately result in a flawless finish once installed.
The Final Thought
Installing kitchen cabinet door handles is a simple yet effective way to update the look of your kitchen. By following the step-by-step guide provided in this article, you can easily transform the appearance of your cabinets and give your kitchen a fresh new feel. Remember to measure carefully, use the right tools, and take your time to ensure a proper installation. With a little effort and attention to detail, you can achieve professional-looking results that will enhance the overall aesthetic of your kitchen space. So why wait? Start upgrading your kitchen today by installing new cabinet door handles!