Embarking on a DIY project to install kitchen cabinet handles can not only breathe new life into your kitchen but also enhance its functionality and aesthetic appeal. Understanding the importance of correctly installing kitchen cabinet handles is crucial, as it ensures ease of use and contributes to the overall look of your space. This guide will walk you through the benefits of adding or updating handles, highlight what’s important to consider during the process, and demonstrate why you can tackle this task with confidence. Whether you’re a seasoned DIY enthusiast or a beginner eager to improve your kitchen, learning how to install kitchen chiffonier handles will empower you to make a significant impact on your home’s heart.
What Tools Do I Need To Install Kitchen Cabinet Handles?
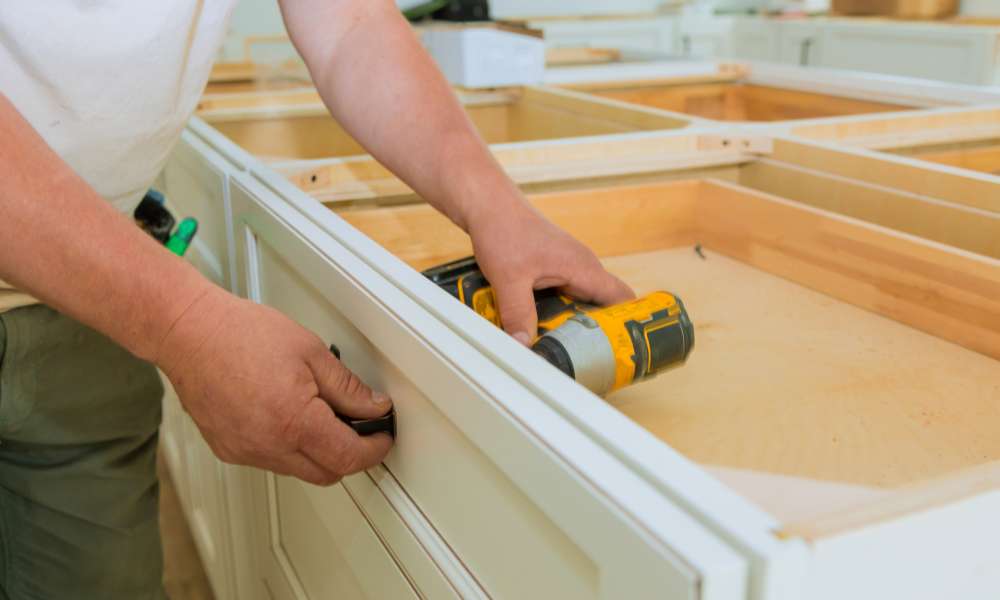
To install kitchen cabinet handles, you will need a few essential tools to ensure a smooth and successful installation process. The primary tools required include a measuring tape, a pencil for marking the placement of the handles, a drill with the appropriate size drill bit for creating holes in the cabinet doors or drawers, and a screwdriver to secure the handles in place. Additionally, having a level on hand is crucial to ensure that the knobs are installed straight and aligned correctly.
Do I Need Any Special Skills To Install Kitchen Cabinet?
Installing kitchen cabinets does require some special skills and knowledge to ensure a successful and professional-looking result. Some of the key skills needed include basic carpentry skills, knowledge of tools and equipment required for installation, as well as an understanding of measurements and spacing to ensure proper alignment and fit.
Can I Install New Handles On Existing Cabinets?
Yes, it is possible to install new handles on existing cabinets. This can be a relatively simple and cost-effective way to update the look of your kitchen or bathroom without having to replace the entire cabinetry. Before starting the installation process, make sure to carefully measure the existing handle hole spacing to ensure that the new knobs will fit properly.
Marking The Cabinet With A Pencil
Using a pencil to mark the exact spot for drilling prevents any potential damage or unnecessary holes in your cabinets. It’s a simple yet effective technique that can streamline the installation process and result in a professional-looking finish. Additionally, taking the time to mark your cabinets accurately showcases attention to detail and craftsmanship, elevating the overall aesthetic of your kitchen space. So next time you’re installing cabinet handles, don’t overlook the importance of marking with a pencil for precise results.
Matching Handles To Cabinet Style
Choosing the right handles that complement your cabinet style is vital in creating a cohesive kitchen design. Cabinet handles come in a wide array of designs, from sleek and modern to ornate and traditional. Consider the overall aesthetic of your kitchen when selecting knobs. For instance, stainless steel or brushed nickel handles can add a contemporary touch to minimalist cabinetry, while bronze or brass handles may suit classic, wooden cabinets better. The shape, finish, and material of the knobs should accentuate the style of your cabinets, contributing to the kitchen’s overall vibe. Matching handles to cabinet style not only enhances the beauty of your kitchen but also reflects your personal taste and attention to detail.
Protecting Surfaces From Damage
Protecting surfaces from damage is an essential aspect of maintaining the aesthetics and functionality of your home. Whether it’s protecting kitchen countertops from scratches, hardwood floors from water damage, or walls from scuff marks, taking proactive measures can greatly extend the lifespan of your surfaces. One effective way to protect surfaces is by installing high-quality and durable materials that are specifically designed for heavy use.
Drilling Pilot Holes
Installing kitchen cabinet handles is a simple way to refresh your kitchen’s look, but it requires precision, especially when drilling pilot holes. This critical step ensures your knobs are aligned perfectly and function smoothly. Let’s delve into the process:
1. Selecting The Correct Drill Bit
The foundation of a flawless installation is choosing the right drill bit. This choice depends on the screws that will secure your handles. Typically, you’ll need a bit slightly smaller than the screw’s diameter to allow for a tight fit, ensuring the handle stays firmly in place. A straightforward way to avoid guesswork is to consult the handle’s installation guide, which often recommends the appropriate size.
2. Drilling Carefully To Avoid Splintering
Cabinet doors, especially those made of wood, are susceptible to splintering, which can mar their appearance. To prevent this, start by placing a piece of painter’s tape over your marked drill points. The tape reduces the risk of splintering by providing a layer that holds the wood fibers together as you drill. Then, proceed with a steady hand, applying consistent pressure to drill through the cabinet door. Remember, rushing this step increases the likelihood of mistakes.
3. Tips For Maintaining Straight Drill Lines
For your cabinet handles to be both visually appealing and functional, it’s crucial to drill straight pilot holes. One effective method is to use a drill guide, a tool designed to ensure your drill bit enters the wood at the desired angle. Alternatively, a simple homemade jig or template made from scrap wood can serve the same purpose. These aids are particularly useful for drilling multiple doors, as they also help achieve uniformity across all your cabinet handles.
Inserting Screws Into The Handles
Installing screws into the handles of kitchen cabinets may seem like a simple task, but precision and care are key in ensuring a secure and long-lasting attachment. Start by determining the right size and length of screws needed for your specific handle design to avoid any damage or misalignment. When inserting the screws, make sure to apply consistent pressure to prevent stripping or damaging the screw heads or handles.
Tightening Screws Securely
To consider is the type of material your cabinets are made of, as different materials may require varying levels of torque when tightening screws. For example, solid wood cabinets may need more tightening compared to laminate or particle board cabinets. Lastly, utilizing a level during installation can ensure that the knobs are aligned properly and help distribute weight evenly across all screws for a more secure attachment. Following these expert tips will not only enhance the aesthetic appeal of your kitchen but also provide peace of mind knowing your cabinet handles are securely installed and built to last.
Safety Tips
1. Using Power Tools Safely
Using power tools safely requires attention to detail and a thorough understanding of how each tool operates. By following these guidelines and implementing proper safety measures, you can confidently tackle projects like installing kitchen chiffonier handles with ease while keeping yourself protected from harm throughout the process.
2. Handling Sharp Tools And Materials
Sharp tools and materials are often necessary for the precise installation of kitchen cabinet knobs. Exercise caution when using drills, saws, or any cutting instruments, keeping your hands and fingers clear of blades and bits. Store sharp tools safely, with covers on blades and bits when possible, to prevent accidental cuts. When handling new cabinet handles or other hardware, be mindful of sharp edges or burrs that could cause injury.
3. Ensuring A Well-Ventilated Workspace
Proper ventilation is key to maintaining a safe environment while installing kitchen chiffonier handles. Some installation steps, such as sanding or drilling, can produce dust or fumes that shouldn’t be inhaled. Work in a well-ventilated area, opening windows or using fans to circulate air. If using any chemical agents for cleaning or adhesive purposes, read the instructions carefully and ensure adequate airflow to prevent inhalation of toxic fumes.
Recycling Old Hardware
Recycling old hardware like kitchen cabinet knobs offers a plethora of possibilities beyond their original purpose. With a bit of imagination and resourcefulness, these seemingly obsolete items can be transformed into unique decor elements that make a statement in any space. By exploring alternative uses for old hardware, we not only contribute to reducing waste but also add individuality and style to our homes through thoughtful upcycling techniques.
Saving Money With Diy Installation
Opting to install kitchen cabinet handles yourself is a smart way to save money while updating your kitchen. Professional installation can be costly, depending on the number and style of handles you’re installing. By doing it yourself, you eliminate labor costs and learn a valuable skill that can be applied to future home improvement projects. Before you begin, ensure you have all the necessary tools and hardware—investing in the right tools can save you time and frustration during the installation process. Additionally, purchasing handles in bulk or choosing cost-effective styles can further reduce expenses. Although high-end knobs may be tempting, numerous affordable options look great and function well. By installing kitchen cabinet knobs yourself, you’ll not only save money but also gain the satisfaction of personal accomplishment and a customized look for your kitchen.
The Final Thought
Installing kitchen cabinet handles is a simple yet effective way to update the look of your kitchen. By following the step-by-step instructions outlined in this article, you can easily achieve a professional and polished finish. Remember to take accurate measurements, choose the right style of handles for your cabinets, and properly align them for a cohesive appearance. With the right tools and a little patience, you can transform the look of your kitchen with new cabinet handles. Take the time to carefully install each handle for a flawless result that will enhance the overall aesthetic of your space.