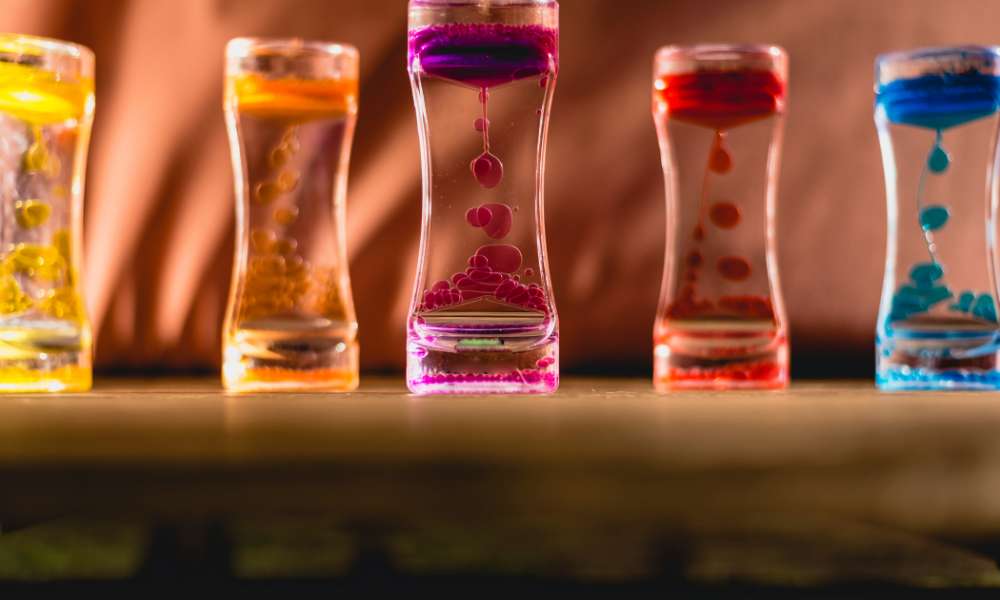
Lava lamps, with their mesmerizing flow and vibrant colors, have captivated people for decades. Their unique design and soothing motion make them a popular choice for adding a touch of retro charm to any space. The appeal of lava lamps lies not only in their aesthetic but also in their ability to create a calming ambiance. For those who enjoy hands-on projects, How to make lava lamps
making your own lava lamp offers a rewarding DIY experience. Crafting a custom lava lamp allows you to personalize its appearance and learn about its inner workings, combining creativity with a sense of accomplishment.
Gather Your Supplies
To begin your DIY science experiment, it’s essential to gather the right materials. You’ll need a clear bottle to serve as your experiment’s container, water to fill it, lava lamps vegetable oil to create the visual effects, and food coloring to add vibrant hues. Alka-Seltzer tablets are crucial for creating the bubbling effect, and a flashlight or lamp will illuminate the finished product for a dramatic display. For sourcing these materials, most can be found at your local grocery store or online. Ensure that the bottle is transparent to allow for easy observation of the experiment’s results, and choose a flashlight or lamp that provides sufficient light to enhance the visual effects. By preparing these supplies, you’ll set yourself up for a successful and visually engaging project.
Prepare the Bottle
To ensure the best results, it is crucial to properly clean and prepare the bottle before use. Start by thoroughly washing the bottle with warm, soapy water to remove any residues or contaminants. Rinse it well to eliminate any soap remnants, and then dry the bottle completely with a clean towel or allow it to air dry. Using a clean, dry bottle is essential as any moisture or residue can affect the quality of the contents and potentially lead to contamination. Proper preparation not only guarantees the cleanliness of the bottle but also enhances the overall safety and effectiveness of its use.
Add the Water
When filling your bottle with water, it’s essential to do so carefully to ensure optimal performance and safety. Begin by placing the bottle under a tap or pouring source and gradually fill it to avoid spills. Leave some space at the top of the bottle to accommodate any potential expansion of the liquid, especially if the water is heated or if the bottle is to be sealed. This extra space helps prevent leaks and ensures that the bottle’s seal functions effectively. Properly managing the water level not only extends the lifespan of your bottle but also enhances your overall user experience. By following these simple steps, you can ensure that your bottle remains in good condition and ready for use whenever you need it.
Add the Oil
Pouring vegetable oil into the bottle is a straightforward step, yet crucial for achieving the desired mixture. Begin by carefully measuring the amount of vegetable oil needed and slowly pour it into the bottle. The reason oil and water separate lies in their distinct physical properties. Vegetable oil is nonpolar, meaning it does not dissolve in water, which is polar. This difference causes the two substances to form separate layers, with the oil floating on top of the water. Understanding this separation helps in crafting mixtures where distinct layers are needed, ensuring effective results in various applications.
Add Food Coloring
To add food coloring to the water effectively, start by selecting high-quality food coloring in your desired shades. Begin by adding a few drops of food coloring to a small amount of water in a bowl, then stir gently to blend the color evenly. Gradually mix this colored water into your main water source to achieve the desired intensity. For vibrant, eye-catching results, consider experimenting with color combinations such as blue and green for a teal hue or red and yellow for a bright orange. Ensure you test your color mixtures in small quantities before applying them to larger volumes to achieve the perfect shade and avoid over-saturation.
Prepare the Lava Effect
To prepare the lava effect, start by breaking Alka-Seltzer tablets into small pieces. This step is crucial for creating an impressive and dynamic lava flow. Begin by carefully snapping each tablet into smaller fragments, ensuring they’re not too fine or too large.Read, How Do Oil Lamps Work. Once the tablets are broken, add them to your mixture to initiate the lava effect. The reaction between the Alka-Seltzer and the liquid will produce a bubbling, lava-like flow that mimics a volcanic eruption. Follow these steps meticulously to achieve a visually captivating and effective lava effect for your project.
Create the Lava Lamp Effect
To achieve the captivating lava lamp effect, begin by carefully heating a tablet within the liquid solution. As the tablet reacts, it releases gas that forms bubbles, which rise and fall, creating a mesmerizing, lava-like flow. To ensure a consistent lava flow, use a high-quality tablet designed for this purpose and maintain a stable temperature throughout the process. Additionally, experimenting with different types of liquids and tablet combinations can enhance the flow’s consistency and visual appeal. This technique not only creates an engaging visual display but also provides a fun and educational experience.
Optional: Add a Light Source
To further elevate the impact of your bottle display, consider adding a light source. Placing the bottle on a lamp or near a flashlight can dramatically enhance its visual appeal. The light source not only highlights the bottle’s features but also creates a captivating glow, making it the focal point of any room. By strategically positioning the bottle where the light can illuminate its contours, you amplify its aesthetic effect and add a touch of sophistication to your décor. This simple addition can transform an ordinary bottle into a stunning visual centerpiece.
Troubleshooting Common Issues
When encountering common issues such as lack of movement or cloudiness in your project, it’s essential to address them promptly to ensure successful outcomes. For instance, if you’re dealing with a lack of movement, checking and adjusting the proportions of your ingredients or refining your technique might be necessary. Cloudiness, on the other hand, can often be resolved by ensuring proper mixing and maintaining clean equipment. By following these troubleshooting tips and making the necessary adjustments, you can improve the quality and effectiveness of your work, leading to better results.
Safety Precautions
When handling materials and using a lava lamp, it’s essential to follow safety tips to ensure a safe experience. Always handle the lamp with care, avoiding any sudden movements that could cause spills or breakage. To prevent overheating, never place the lamp near heat sources or cover it while in use. For disposal or recycling, ensure you follow local regulations regarding electronic waste. Carefully dispose of or recycle components like the glass and electrical parts through designated recycling programs. By adhering to these safety precautions, you not only protect yourself but also contribute to environmentally responsible practices.
Creative Variations
Elevate your space with creative variations of lava lamps by experimenting with a range of colors and effects. Personalize your lamp with unique hues that complement your decor or create a captivating ambiance. For special occasions, consider themed lava lamps such as holiday-inspired designs that add a festive touch to any room. Whether you’re updating your living area or looking for the perfect gift, these customized lava lamps offer endless possibilities for creativity and personal expression.
What materials do I need to make a lava lamp?
To create a homemade lava lamp, you’ll need a clear bottle or jar, vegetable oil, water, food coloring, and effervescent tablets like Alka-Seltzer. These ingredients work together to simulate the classic lava lamp effect, with the oil and water creating a layered effect and the tablets causing the bubbling motion.
How do I get the lava lamp effect?
To achieve the lava lamp effect, first fill the bottle about two-thirds full with vegetable oil. Then add water, leaving some space at the top. Add a few drops of food coloring to the water. Once you have a vibrant color, drop in an effervescent tablet and watch as bubbles rise and fall, creating the lava-like movement. You can adjust the amount of tablet to control the intensity of the effect.
Can I reuse the lava lamp solution?
Yes, you can reuse the solution in your lava lamp. Simply add more effervescent tablets to refresh the effect. If the liquid becomes cloudy or if you want to change the color, you may need to replace the water and food coloring. Ensure the bottle is sealed tightly when not in use to prevent spills and contamination.
Conclusion
In summary, creating your own lava lamp involves a simple yet engaging process: gather materials, mix oil and water with food coloring, and add effervescent tablets to initiate the lava effect. This DIY project not only provides a captivating visual but also a chance to experiment and personalize your creation. Embrace the process, have fun, and let your creativity flow with this hands-on science activity.